
Brain Breaks are short activities, often only 1-3 minutes long, that help kids get ready to learn or refocus on the task at hand. They often involve physical activity and movement though relaxing activities can also boost mental brain power. So, in addition to encouraging your kids to participate in these fun breaks, join the kiddos and have some refreshing, stress-free fun yourself, too!
Making paper airplanes is an awesome classic activity for kids.
Supplies Needed:
- Letter size (8.5″ x 11″) sheet of printer paper
- Crayons, markers, or paint to decorate the paper (OPTIONAL)
Tips for getting started:
Carefully line up the ends of paper to make them even BEFORE creasing a fold.
Emphasize the importance of making a strong crease with each fold.
If it’s not perfect, that’s just fine! Even with a few mistakes, the plane will likely still fly, and maybe a bad fold on one side will make the plane fly curved towards one direction. That is a learning experience as well.
Safety:
When the paper airplane is folded, there is a pointed tip. Please instruct your child not to throw the paper airplane directly at anyone, and especially at faces. The nose of the paper airplane is pretty soft, but can be painful and potentially harmful if it is thrown at or into an eye. For this reason, please insist that paper airplanes are NEVER thrown towards faces.
Here’s what you do:
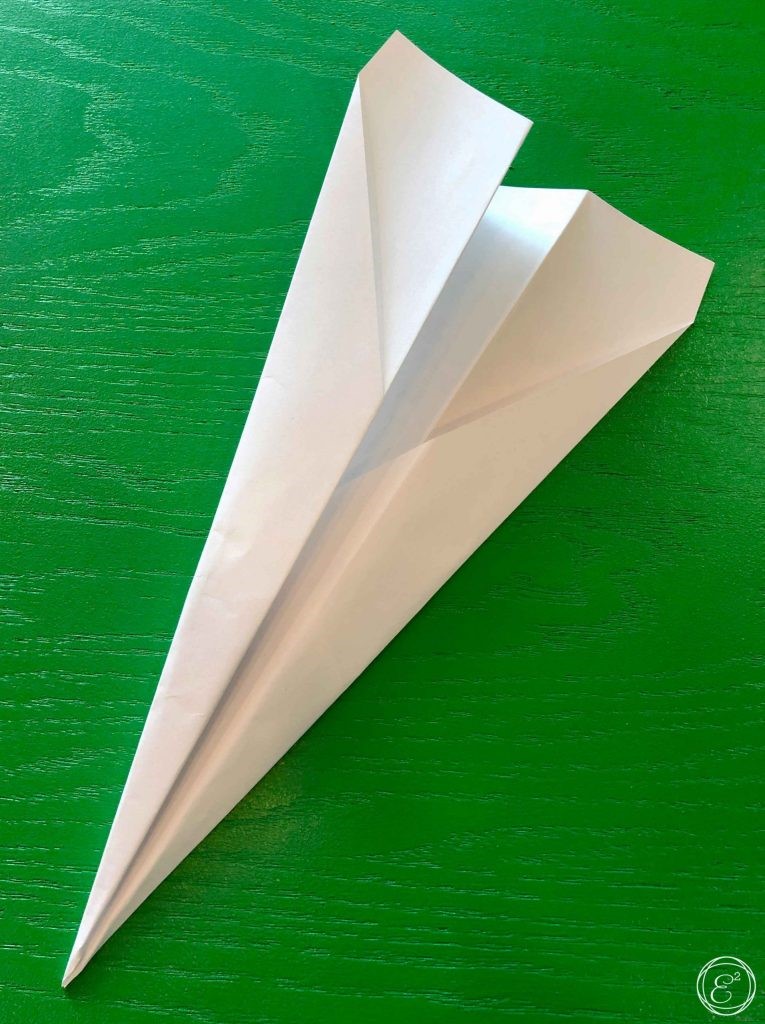
Classic Dart Paper Airplane
STEP 1: Lay out your copy paper horizontally on a clean table, desk, or other flat surface in front of you.

STEP 2 (OPTIONAL): Color both sides of your paper with designs and patterns that will decorate your folded paper airplane.
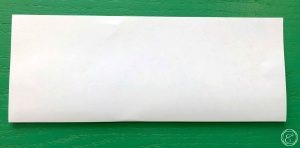
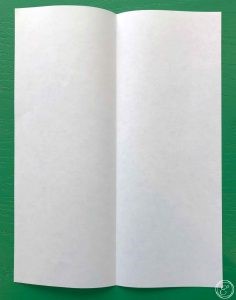
STEP 3: Fold the paper in half long ways (remember to use strong creases with each fold), then reopen the paper.
STEP 4: Turn the paper vertical and open it up again.
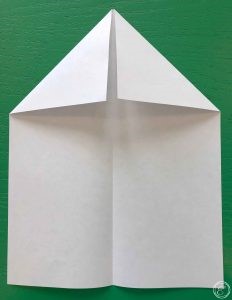
STEP 5: Fold the top right corner on a diagonal towards the center line, repeat on the left side (your paper should now resemble a house).

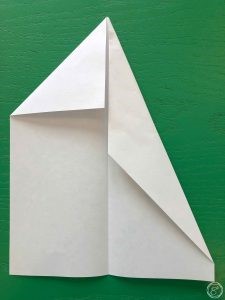
STEP 6: Repeat STEP 5, again folding the top right corner (starting at the newly folded crease) in towards the center, repeat on the left side (your paper should now look like a long triangle with about 1″ of paper not folded at the bottom).

STEP 7: Refold the plane in half long ways, along the center crease you created in STEP 3.
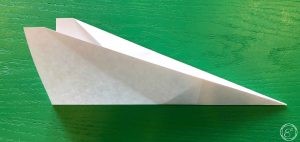
STEP 8: With the paper lying with the crease facing you, fold back the top edge down to meet the middle crease, flip the paper over and repeat on the other side, creating the wings.
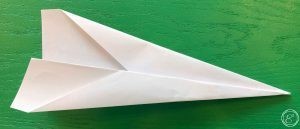
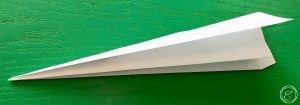
STEP 9: Lightly grip the plane by the middle of the center crease in your dominant hand. Pull your hand back to your shoulder with the airplane level with or slightly above your head, then shoot your hand forward, aiming slightly upward, while releasing the plane to make it fly.
Challenge extensions:
Encourage your kids to experiment with the paper airplanes and do lots of test flights to see how small changes affect the flight.
Add cuts to the paper airplane to see what effect that has on its flight.
Add stickers to the plane to see what effect that has.
Line up with your airplanes, count down from 5 to 1 then let them fly. Discuss which planes flew further or faster and why.
Investigate and discuss the four forces of flight.
“The Why” behind the Activity:
While making paper airplanes your child is building these skills: creativity, following instructions, and problem solving.
Check out these books for more fun!

Flight School by Christopher L. Harbo
Making Paper Airplanes by Amber Lovett
The Paper Airplane Book by Seymour Simon
Pilot by Christopher L. Harbo